Showing posts with label time management. Show all posts

15 May 2019

smythson of bond street duke's organiser (A5 size equivalent)

Back when I was still a student, I had a Smythson Bond Street organiser which I absolutely loved. However, I stopped using it because it seemed a bit too small for me and the A5 seemed to be too large a size for my needs. The Smythson A5 size is called the 'Duke' whereas the personal sized one is called the 'Bond street' - bit misleading as their brand name is Smythson of Bond Street! 

Anyway! When I was hunting for an A5 Filofax to use, I found this Smythson Duke's organiser on eBay for a fairly good price. I just couldn't resist and before long, it was in my hands. It's a neutral colour with the gold accents coming from the clasp. 

Comparing it to the A5 Filofax Original I have, this Smythson is much heavier and feels like it is made of better leather (as expected with its RRP!). The clasp on this Smythson seems a bit more flimsy compared to the A5 Filofax one and one other negative is that the pen loop is made of leather and can only take a slim pen as a result. I guess some elastic would have cheapened the look somewhat but it would have been nice to be able to put a fountain pen in the pen loop!

The layout inside is exactly the same as the Bond Street sized organiser by Smythson. 

This really is a lovely organiser but due to its weight and inability to hold a fountain pen in the pen loop, I think the A5 Filofax may be my everyday carry, with the odd moment in this Smythson (for when I want that bit of luxury)! 

1 May 2019

full circle: back in a filofax but this time, an A5 original!

Many moons ago, I wrote about my disappointment with the Filofax brand. There were many things: the ring problems, the paper quality, the leather quality, etc. Fast forward a number of years and I have decided to give them another try - mainly because my sister uses an A5 Filofax and has had no issues with hers. Back in the day, I preferred the 'personal' size but reflecting on my needs now, an A5 size felt like the better fit.

I compared the prices of current A5 Filofaxes and narrowed it down to a few options. I knew I wanted leather and something timeless and neutral in colour. It just so happened that this A5 Filofax Original in nude turned out to be the cheapest and I succumbed to ordering it from Amazon as I had a gift card to use, bringing the cost down further. This happens to be the exact same model as the one my sister has too and we're embracing being Filofax twins.

When it first arrived, five of the six rings were perfect. The top ring had a 1.5mm gap to it and I noted that pages kept catching on it so back it went. A replacement arrived a couple of days later and I'm pleased to report this one had no page catching issues though the top ring still looks a bit precarious.


The leather is a lovely patent nude with rough edges which I'm okay with. These pictures make it look lighter than it is - it is more of a true nude in real life.

On the inside, there is an elasticated section which can potentially hold two pens (one would have to be a slim one!), with two card slots and a larger full length slot for anything you choose. As always, I have made a dashboard at the front using the clear plastic that initially came with the Filofax. I have replaced the Filofax dividers with Smythson ones (more on the Smythson in the next few weeks). I prefer the thicker card of these Smythson ones as they feel a lot more durable.


Behind the first divider is a page with some essential info on and to-do lists.


Hiding behind the second one are budget planning sheets and notepaper.

Behind the third section is my planner which I have opted to get from Kikki-K. Let me just say, the paper is unrivalled. It takes fountain pen ridiculously well and the bright white paper is a nice contrast to the blue ink I have decided to use (Kyo-no-Oto Hisoku). There is a year planner, a month planner and a weekly planner within these inserts.


The month inserts have clean lines with a handy 'notes' section on the right side. Each box leaves plenty of space for events that need noting down.


At the top, I have used a Midori clip to denote which month we are currently in and of course, from today, I will be using number '5'.


The inserts themselves are minimalistic and have the bare minimum on them. My only gripe is that there is a slot each day for a 'birthday' which seems a bit excessive. However, I've found more than enough space for each day. Next year, I'll probably go for a week on one page with a notes page on the other side.

Going back to my old ways, I like to add in colour, stickers and washi tape :-)


The final section has a host of notepaper in too. I've got an assortment of notes in here and the one I've shown is what I need to finish this year in training (which runs until August 2019) and what I need if I decided to opt for Emergency Medicine as a career. This is so I can stay focussed with my eyes on the prize.

Unfortunately, I'm still finding the Filofax paper to be a bit shoddy on quality so I've resorted to ordering some 90gsm A5 plain paper to print on and punch myself.


At the back, I have a zipped pocket from Kikki-K, currently empty but will fill up in no time. There is also an A5 Tomoe River paper notebook (unfortunately, I've forgotten the brand!).


Though still early days in this Filofax, I am already preferring it to the Leuchtturm I was using. As much as I liked using a bound diary, it did irk me that I'd have to transfer information from one planner to another. I also don't like writing things down and then not being able to rip it out and shred/recycle it once no longer needed. Hopefully, this Filofax will serve me better!

30 Jun 2016

(almost) a year with my rifle paper co planner

I used to think bound planners were bulky and hard to customise but I've grown to like the fact that I can't move pages around. Ring planners used to be my go-to because of how easy it was to create a setup that worked for me and I can still see the appeal but I definitely don't miss the weight of them. The one thing about this planner is that it doesn't look bashed about at all! The cardboard cover is fairly thick but I didn't think it would hold up this well after about ten months of use.


My weekly pages have really changed throughout the years and it's now at the point where it is severely minimalistic. Admittedly, I don't miss the many stickers I used to decorate my pages with and instead, I'm content with just a handful. The weekly layout gives me plenty of space to plan my week and also incorporate a daily to-do list.


At the front, I have a few pages and I like to use them to write lists of things. One such list is of tea I want to try:


At the back, the pockets have been really handy. I have a collection of things in there from vouchers to receipts to little pieces of paper with university notes.


Overall, this planner has been well-used. All sections have been used and there isn't a wasted page. What you can't see are my other notes pages which hold a lot of information I may need when out and about, birthdays and other events are written down in the 'important dates' section, monthly pages are used to plan posts for this blog (I may share these later on in the year/early next year!) and at the back, the contacts pages are filled with addresses of friends and family.

I'm now using a different planner for the next academic year and you'll see its first week this Sunday. This Rifle planner has served me well but I need something less bulky to tote around in my bag :)

9 Jun 2016

my hobonichi techo in use on placement

Since my Hobonichi arrived, it has seen plenty of use on placement. Tomoe River paper has been a revelation as a fountain pen user and as tempted as I am to consider ordering another when the 2017 ones are released, these diaries are just a bit too pricey for my liking. I'm glad that I've tried them once though!

Daily and Weekly Planning

One of the most important things my Hobonichi is used for is the planning of my days and weeks. This was invaluable on Paeds when each day was unstructured and I had no set timetable.


Making Notes

The day-per-page view has been used for note-taking during teaching and feedback sessions.


I also write in interesting cases on the days where I've been to handover or ward round. This enables me to look things up if I didn't quite understand or ask questions at a later time. 


One thing I also try and do is make a note of all the things a consultant or registrar has said in clinic or of all the cases I saw. It might seem really keen but I've gained so many marks in exams from just drawing on experiences in clinic, on ward round, in theatre, etc.


Blank pages come in really useful for when I need to make notes for future reference. An example is below where I've made a note of the developmental milestones.


The card slots are also really helpful: one holds a card from the Royal Society of Medicine where there are reference ranges for common blood tests and another slot holds some page flags. 


Finally, the back pocket holds various sign off sheets such as my log book, paper forms that need signing during my time on placement and my timetable if I was given one.


All in all, the various pockets and slots that come with the Hobonichi cover have come in extremely useful and the Hobonichi Techo itself has been a revelation. The two page markers are also useful - one for the current date and the other for the first blank page that can be used to make notes on or write up a clerking on.

I'm happy with this system and how it is working out but I am questioning if I am prepared to drop such a large amount of cash on another next year. The answer is that it is very unlikely so I'll need to think about what I'll use instead.

31 May 2016

timetabling: how to deal with a lack of structure on placement

This year has been all five week placements and sometimes, I'm given a set timetable to follow but other times I'm not. This can make it hard to find the motivation to go in or even plan your social life for the week! I thought I'd explain how I deal with a lack of structure on placement.

Firstly, have a week-to-view table that you can use to plan each placement day. You'll most likely be given dates and times where there'll be teaching so write those in immediately. Next, find out what clinics, theatres, other learning opportunities there are - find out when they happen and what time and then decide what you'd like to do. Fill your blank spaces with these. If you also do a sport/extracurricular activity on a regular basis, write those down.

I know this all sounds like common sense but I was surprised at how some of my fellow medical students hadn't even done something like this. Maybe I'm just obsessive about organisation but in medicine, I feel you have to be at least moderately organised to ensure that you get all your assessments done in a timely manner, etc.

Below are my weekly timetables; firstly in a blank notebook and secondly in my Hobonichi (which has been invaluable this year for keeping on top of things).

3 Mar 2016

using two planners simultaneously: rifle paper co and hobonichi

This year, I decided to try and keep my university and personal life as separate as possible and to do this, I've opted to use a Hobonichi Techo alongside my Rifle Paper Co planner.


My Hobonichi follows me around the wards and on placement whereas my Rifle planner stays at home on my desk where it holds my home and personal life to-dos and events.

On placement, I used to use an A6 notebook where I'd mock up a schedule for myself and then use the rest of the notebook to take notes regarding what I've seen in clinic, on ward round and in A&E. There are also notes from teaching in there. 


Because the Hobonichi Techo is dated, I don't need to painstakingly draw up my own weekly schedule and can instead fill in the gaps as you can see below:


The amazing Tomoe River paper means that I can use fountain pen in the Techo without fear of bleeding or show through! Later in the year, I'll show how the day-per-page diary is used on placement but for now, this is how I separate and plan my life.

In the Techo, I'll have a brief note (usually in pencil) for when I have personal things scheduled, for example, dental appointments and drinks with friends, etc. This way, I can see what other things are planned but I won't see the more personal and health-related things (ahem, if you're a girl, you'll know what I mean) or inadvertently show them to a colleague. 

I'm going to see how this system works out for me this year because the plan is to note down jobs that need doing whilst on ward round/interesting cases seen in clinic. The only issue I have at the moment is the lack of pages available to me for clerking patients so a compromise may have to be struck (weekend pages are currently an option for this!).

22 Dec 2015

a tour and review of my rifle paper co planner in use

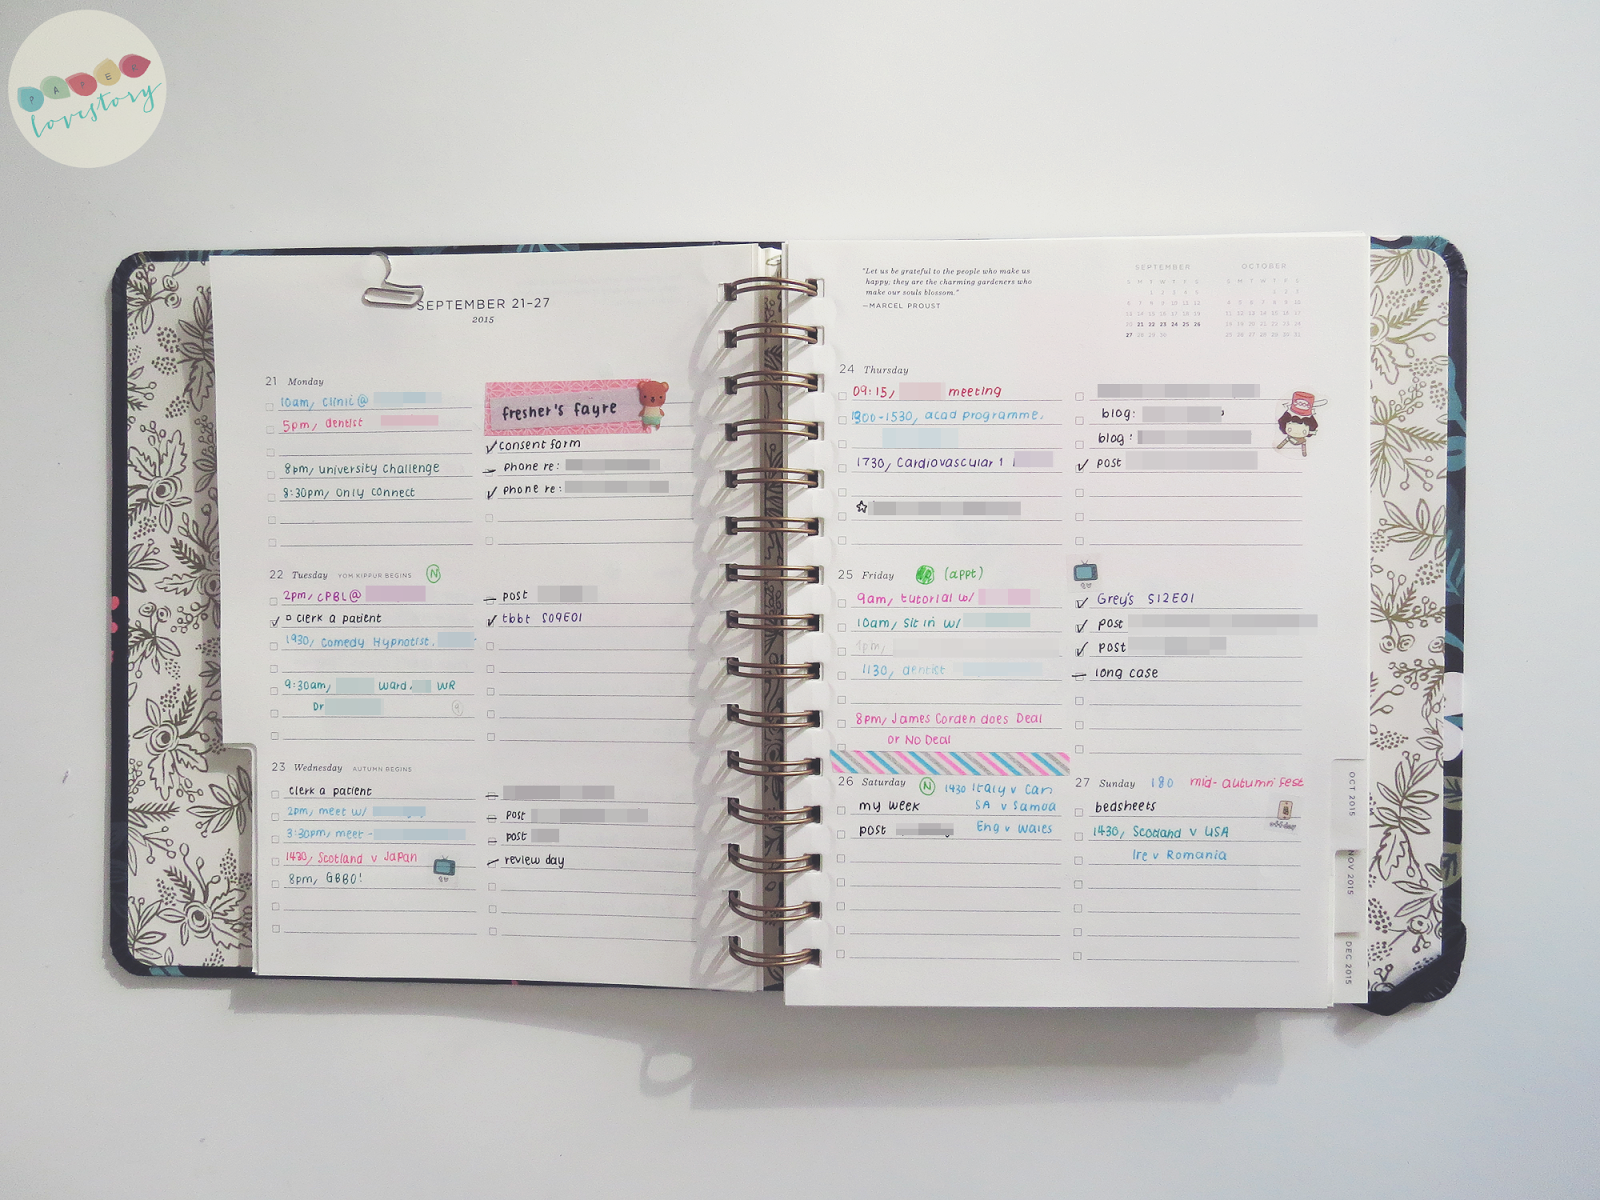
Back in September, I introduced my Rifle Paper Co planner for the latter part of 2015 and the whole of 2016. Today, I want to share how it looks when in use and also do a more thorough review of it.


Cover and Materials

The cover is made of hard cardboard and the cream paper used for the diary inserts feels very thin but actually holds gel pens quite well. There's no showthrough with the Muji gels I've been using in it and the thin paper ensures that isn't too heavy to tote around in your bag.

Even though I've had this for two and a half months' now, the cover design still has me in awe of its beauty every time I use it. The inside cover has space for your name and I've decided to use washi tape here to add some colour.

The page size is A5 but the overall size is slightly wider and just a tiny bit taller than that. In terms of weight, it is definitely lighter than a ring-bound planner but I do still kind of miss the ability to chop and change the pages I carry around with me on a daily basis. That said, I don't miss the weight or the rings that really get in the way when writing!


Yearly and Monthly Pages

The yearly pages are currently used to plan festivals in 2017 (in hindsight, I should probably look up 2016's sometime soon!). Although I live in the UK, I try and stay as close to my cultural roots as possible and there are some Chinese festivals I must celebrate.

Monthly pages are spacious and aren't used as much as my weekly pages but this has always been the case for me. I mainly use them for two things: one - to gain an overview of when my bursary comes in (essential to ensure I have enough to pay for transport to and from placement, and food of course!) and two - to keep track of some health things.


Diary Pages and Lack of Bookmark

There is more than enough space in the weekly pages for my planning. I use the left hand side for what my daily schedule involves and the right hand side for tasks that need doing. My one gripe is that there is no intrinsic bookmark and I've ended up using a Midori brass clip for this purpose. The number '10' is seen above as that was used during October and it was switched to '11' for November, etc.

Occasionally, the spiral rings can get in the way when writing in the pages but it's not quite as bad as when using a ring-bound planner because these rings are smaller.


Extra Storage Space, Note Pages and Address Pages

The extra storage space at the back is perfect for receipts, vouchers and diary stickers and as it is double sided, there's never been that dilemma where I've run out of space for those extra bits and bobs.

There are more than enough note pages for me personally but with only eight sides available for this purpose, some of you may not agree. Furthermore, in the contacts section, there is only enough space for 18 addresses and contact details and again, for many, this won't be enough. But then again, who needs to carry around an address book with them on a daily basis anyway? Ultimately, whether or not you can see past this depends on what how you use your daily planner.

Overall

To conclude, this is one of my favourite diaries ever used and the design definitely contributes to this opinion. I'm a sucker for beautiful stationery and this planner represents that to the T. Add in the high quality paper used for the pages and the thought that has gone into designing a functional, yet aesthetically pleasing planner, it was always going to be a winner for me.

24 Sept 2015

how I defeat procrastination

Procrastination is a beast that rears its ugly head during exam time and other periods where we have a deadline for a project/assignment. I think I finally managed to get the better of it this year using a variety of tools and methods. These methods may not work for you but I'm hoping they'll at least help give you ideas about what sort of things could help increase your productivity.

1) Use the FocusNow app


This app was seriously addictive. Each 25 minute burst you do grows a fruit/vegetable and the more you grow, the more points you get. These points are totted up and there's a leaderboard for each week. If you play with your phone when it is running, you 'kill' the fruit/vegetable and have to start all over again. You can do more than one 25 minute session in one go but the maximum I ever went for was 50 minutes. After that, I'd have a break where I'd allow myself to either get a snack or do a bit of exercise for 5-10 minutes before starting a new session.

Trust me - growing a fruit farm was seriously addictive!


2) Get enough sleep.


On the days where I was tired, I found myself wanting to nap and just unable to concentrate. On these days, work/revision was a complete write off but that's ok because of the next point...


3) Schedule in one day a week where you don't do any work.

This takes the pressure off working every day and a rest is good for your brain. No one can work continuously and it's not good for you! It also gives you a whole day to procrastinate!


4) Reward yourself at regular intervals.


At the end of each day, I'd allow myself the evening off from 8pm onwards to watch television or do anything else that I fancied. This meant I always had something to look forward to and ensured I got to work in a timely manner. You can use different incentives depending on what your mood is and you might even find yourself working harder and more often than before because of these rewards.

One of the rewards I used were the Byron Bay cookies you can see above. They are amazing and don't even taste or feel like gluten free cookies. The white chocolate chunk and macadamia nut flavour was my absolute favourite.


5) Positive reinforcements to remind you why you're doing this.

Try and see the bigger picture: this pain is temporary but the results could last for a lifetime (or a very long time at least!). Remind yourself that you're doing the best you can but that limits are there to be beaten; after all, that's why world records are broken time and time again. Motivate yourself through positive quotes (a Google Image search will throw up many results if you just type in 'inspirational quotes'!) and just believe in yourself.


This is what I did during last academic year's exam period and I didn't do too badly when results were released. These things may not work for you because everyone's slightly different. I know some people who can work solidly for an hour and not find their concentration wanes are half an hour but for me, I have quite a short attention span.

15 Jul 2015

bound planners vs ring binder planners

When I first started blogging, I was a bit of a Filofax-obsessed fan. Ring binder planners were something that I never thought I would move away from and in fact, I used them for a solid five years before moving to a bound planner this year. I flirted briefly with a Moleskine back in 2011 for six months but inevitably went back to a Filofax. Then in 2012, I purchased a Smythson binder and my love deepened for ring binders.

Anyway, as someone who has now turned into a bound planner fanatic and with someone asking for my thoughts on bound vs ring binder planners on Twitter, I thought it would be an interesting post to write.


Bound Planners

Pros:

  • Lighter in terms of weight.
  • You can have a new one every year (or even every six months with some undated planners!).
  • Look good on your bookshelf after the year is up.
  • Can be cheaper compared to a ring binder - prices and range from very cheap to very expensive (such as some of the beauties by Smythson!).
  • There are so many cute ones out there (especially from East Asian companies!).
  • Undated planners mean you can start using one whenever.
  • Available in a wide range of layouts and designs.

Cons:

  • Not very flexible in terms of layout.
  • Have to re-write in information every year.
  • Limited by what you can have in it - probably not possible to have your address book in there too!


Ring Binder Planners

Pros:

  • Flexibility in what pages you choose to have in it.
  • You get to choose what sections you have in your ring binder: don't want monthly planning pages? Not a problem, don't put them in. Tabs can be inserted or taken out to your fancy.
  • There is the option to design your own inserts and print them onto high quality paper.
  • No need to re-write in essential pages each year.
  • A leather ring binder feels very luxurious.

Cons:

  • Limited diary layout choices.
  • Some of the paper quality out there is debatable (but at the same time, there are some very good ones out there too!).
  • Can be very heavy, especially if overstuffed.
  • Potential ring issues!
  • The worry of damaging the leather.
  • Expensive initial cost depending on what brand and model you opt for. Inserts also cost extra!

Overall, I think the main thing to consider is what you want to get out of it. If flexibility is a deal breaker for you, a bound planner probably won't be something you'll get along well with. If you've never tried a ring binder before, it might be worth starting out with a cheaper (possibly non-leather) model to see how you get on with it for a few months. Even though I'm more of a bound planner girl now, I still have my Smythson and Filofaxes stored away safely in case I decide to go back to them (which I may well do in the future - who knows!).

What are your thoughts? Are you one or the other? Or do you constantly flit between the two? Do you use both types simultaneously? :)

12 May 2015

how I create my revision posters

Sorry it has taken my so long to write this post - the pictures were taken back in February/March so I have no excuse! Anyway, here is how I create my revision posters.

First off, I'm not sure how applicable this can be to other subjects but I find them super useful for each of the conditions I need to know about for exams. By limiting my page size to A4, I have to choose what information is essential to know with the more intricate details left within my revision notebook

I try and make the heading as attractive as possible and I also like to use coloured A4 paper just because I feel like it. These posters aren't colour coded in anyway. 


Within the posters, I use mini post-it flags or page markers. I divide the page into thirds or halves, depending on the condition and then try and organise it in a logical manner.


For example, my leukaemia poster is divided into halves because there are acute and chronic types of leukaemia. These halves were then divided in half again because there are two types of leukaemia (myeloid and lymphoblastic).


For me, the most important parts of a condition are:
- the definition;
- clinical presentation;
- investigations;
- management and;
- prognosis.

Occasionally, I'll include some pathophysiology, risk factors and causes too. Sometimes, these bits are fit above and below the line drawn on either side of the poster title (you can kind of see this in the COPD poster in the first photo above where I've noted the pathophysiology with keywords).

This can be applied to any topic because all you need to do is decide what the most important bits you need to know are and then arrange it in a logical way on the piece of paper. Because I plan on using these for years to come, I try and make them as neat as possible - and I would recommend doing the same because you won't look at an ugly poster twice but you will keep on staring at something you deem aesthetically pleasing.

I hope this has been useful and I know that this method won't work for everyone. You might want to adapt some parts of it to suit your own way of learning but fitting everything onto a single side of paper is a good way to ensure that you get the basics nailed before moving onto the niche detail.

I've had a few people ask on Instagram about sharing the posters I've made for each condition but at this moment in time, it won't be possible as they are done in line with the learning objectives outlined by my university. These learning objectives are not allowed to be shared so I'd rather not run the risk of getting in trouble with my medschool if that's okay. I know you can see what my COPD poster says but as I'm only sharing one or two of these posters (I've shown a pancreatitis one before in the past), this isn't such a problem because I've now got over 50 of these self-made posters :)

19 Mar 2015

to-do lists: no task too small

Ticking things off a to-do list is seriously addictive and once you've ticked one thing off, you just want to tick another, right? However, writing a to-do list can be daunting, especially if it results in you writing down twenty things that need to be done within a short time-frame. However, by jotting down these tasks, it may make them seem less so, especially if you order them based on how long they will take to do.

This is how I write my to-do lists but what works for me may not work for you. I know some people like bullet journals and other systems so the main thing is to find a way that works for you.

1) Regular Tasks

The first tasks I write down are ones that I do on a regular basis - some say it takes 21 days to make things a habit so this kind of obsessive note taking can help me in that regard. Also, scheduling regular tasks in for the same time each day helps too.

Two tasks that I do on a regular basis are twenty to thirty minutes on a cross trainer and also my weekly posts which I try and do on a Saturday afternoon or early on a Sunday morning before it goes live.


2) Fluctuating Tasks

Some lists change each week and a good example of this are shopping lists. Here, we do one smallish shop at the weekend for our staple foods (fruit, vegetables and meat) and then one or two mini shops during the week. With a supermarket on my way home from university, this makes it viable for me to do this and that is why my shopping lists are usually quite random. I note them down as and when I remember or realise these things need purchasing and then try and either postpone them until the weekend shop if they aren't urgently needed or buy them the following day after uni.


3) Big Tasks

From time to time, I may have a major project or two. Sometimes, such a big task can be overwhelming so the first thing I do is sit down and break it down into smaller stages and tasks before planning when to do each of these stages.

This works so well for me that I even do this for smaller projects too.


4) Other To-Dos

These are written in when I think of them and I try and ensure that I don't have a long list of them on days where I know I'll be super busy or too tired to even tackle the smallest task.

Sometimes, my to-dos aren't done on the allocated day and that's ok with me - it just means it either wasn't that important to me or can wait until I'm in the mood for it (an example are writing blog posts: sometimes, I'm just not motivated to write that day!).

This is essentially how I organise the things that need to be done in my life - it's not a perfect system but it works well enough for me. I'm always tweaking it but I think that's natural as we mature and go through life changes.

How do you organise your to-do list? Do you have any tips or things that work especially well for you?